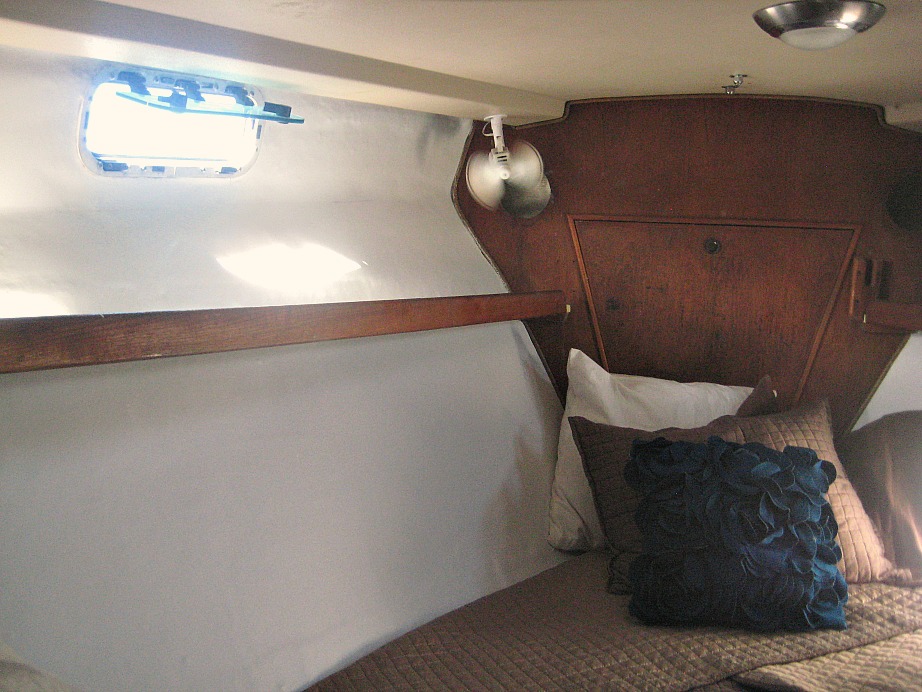
One nice thing about buying a boat that has been stripped bare is that you get to put it back together the way you want, or at least to the amount that your bank account will allow. Our first year of getting Necesse functional was in complete disregard of her looks, it’s was about making her livable, i.e. installing a toilet and putting in lights so that we no longer had to run to the marina to pee or wear headlamps in the boat at night, which we did for our first month living aboard. We need progress away from backcountry camping feel, as all of our guest were getting the wrong idea of what it means to live aboard. Once those necessities were done we could finally start paying attention to the “pretty” jobs. Those included upholstery (indoor and out), paint, cushions, covers for outdoor things, a bimini, de-cluttering, etc. Our boat had been holed and beached before we bought her, patched up by the previous owner, and then sold to us in that “naked” state, without any of the extras. The walls of the inside of the boat were robbed of any siding or covers and were at their minimum, the fiberglass. The prior owner of her had painted them white in the hopes of making them look better, rather than the plain burgundy color of fiberglass, but all the imperfections and divots of the wall caught all the mildew and dirt and ended up looking a rundown ship anyways. It had been a mystery to us what we would use to cover the walls to not only make them look good but also not rot out if ever there were a water leak (which is not uncommon on a boat). We had thought of many options and were even trying to reinvent the wheel. It wasn’t until we did a short stay on a friend’s Hatteras in Miami that I found a solution I liked. Vinyl. I know it sounds cheesy, but if you think about it, most power yachts out there have vinyl siding, it wipes down easy, and looks very clean. We bought a roll in “eggshell white” in EBay and Eben and his cousin went to work. For the assembly, Noah painted contact cement on to the fiberglass wall and the material and very carefully juggled adhering the vinyl to the wall (carefully because once it adheres you are stuck with where it lands). So to be sure it didn’t look like it was done by a drunken sailor he went at it doing two feet at a time. Side note, you will also get very high doing this job from fumes of the contact cement, the girls and I always left the boat to avoid permanent damage to our children brains). Then he would use a razor blade to cut the edges or to cut away holes for any of the obstruction in the way of the material, such as all the hatches. When you are in the midst of all those fumes and trying to do an awesome job, there seems to be an endless amount of obstructions. (I thank those boys because while they were on the boat getting chemical-induced headaches I was on the beach enjoying piña coladas and other mommy/kid friends.) Most of the edges we were able to tuck under the pre-existing vinyl boarder (which will one day get switched out to, what we are currently considering, hemp looking rope). For those other edges that did not get tucked under a finished border, Eben will be removing the vinyl, folding the edge over twice, and sewing it into a makeshift border, creating the finished look. We are very happy with the results of this project, it gave a whole new look to the boat, a cleaner less hobo-boat one. I have cleaned them twice since installing them, and with a cloth and some Simple Green everything wipes clean. It was an affordable and pretty solution.
vinyl walls in front berth
top corner peeled off to show contact cement spot, bottom where the seam needs to be sewn


Nice job 🙂
It made such a good difference from what we had before.